Wednesday, March 4, 2015

Boston Cream Pie

The other day I made an attempt at making eclairs. They did not turn out very well and I ended up with a lot of the creme filling. I didn't want that to go to waste, so I made a Boston Cream Pie /cake.

Boston Cream Pie

1 Yellow Cake Mix
Cream Filling
Chocolate Ganache/chocolate frosting

Cream Filling
1 4 oz Vanilla pudding mix
2 cups cold milk
1/2 c heavy whipping cream 
1/4 c powdered sugar
--Combing pudding mix and milk. Beat whipping cream and add to the pudding along with the powdered sugar.

Make yellow cake as directed on the box in 2 8 or 9 inch round pans. I let mine cool and then wrapped and froze them for a few hours. Trim off curve from the cake you put on the bottom, top with cream filling (you may have leftovers), top with the other cake and frost only the top with chocolate ganache or frosting. I accidently frosted all the sides but it was still delicious!


Monday, October 27, 2014

Table for 1, please

I have a problem.  I hate making a box of mac-n-cheese and having most of it go to waste because only one kid wants to eat it.  So, a few months ago I did the math and figured out how to make one serving of mac-n-cheese from a box.  (I know, I know, they already have this product, but it's not as good as the box, and my kids won't eat it.)

Single Serving Mac-n-Cheese

1/3 c. noodles
1/2-1 Tbsp butter
1 Tbsp milk
1 Tbsp cheese powder

This recipe will feed one small kid.  (Katrina can usually eat all of it.)  For a bigger kid, we double it.
We make this in a pan on the stove, but you could also make it in the microwave.  A box of Kraft Mac-n-Cheese has four servings in it.  After I open the box, I put the noodles and cheese powder in zip-loc baggies and put them back in the opened box.

Here's my other problem.  Sometimes, just at bed time, I feel a mite peckish.  I often don't want to eat anything nutritious at this point, but there's not usually a substantial treat available.  After sampling many emergency chocolate cake recipes, I came up with this one.

Emergency Chocolate Cake

1 Tbsp chocolate chips, dark is best
1/2 Tbsp butter, I eyeball this
3 Tbsp hot chocolate mix, use a high quality mix.  (I like Stephen's Mexican Chocolate.)
4 Tbsp flour
pinch baking powder
1/4 tsp vanilla
3 Tbsp water

Put the chocolate chips and butter into a mug.  Microwave 20 seconds to melt, mix.  Add the rest of the ingredients.  (The baking powder and vanilla are optional.)  Mix together.  Microwave for one minute.  There will be a little slick of uncooked batter on the top.  Eat while it's still warm.  Ignore your spouse's glares for eating in bed and not making him one.

If this seems a little dry to you, try upping the butter.

Sunday, January 26, 2014

Lemon Pound Cake

A while ago I wanted a REALLY lemony cake.  No wimpy lemon flavor need apply.  I was perusing Martha Stewart and came across this cake that contains 4 ENTIRE lemons.  Oh yeah!  It was a little fussy, so I simplified it, but you can get the recipe at www.marthastewart.com/258493/bill-yossess-lemon-pound-cake.

Bill Yosses's Modified Lemon Pound Cake

Cake
4 lemons, Meyer, if you can get them
2 2/3 c all-purpose flour
1 1/2 c sugar
1 1/2 tsp baking powder
3/4 c milk
6 large eggs
11 Tbsp butter, melted

Glaze
2 c. powdered sugar
1/4 c. lemon juice

Make the cake:
Preheat the oven to 350. Spray 2 loaf pans generously with cooking spray.  Grate zest from lemons; set aside.  Remove white pith from lemons.  Hold lemon over a bowl, and cut between the membranes into sections, allowing sections and any juice to fall into bowl.  Squeeze juice from membranes.  Repeat with remaining 3 lemons.  Sift flour, sugar, and baking powder into the bowl of an electric mixer fitted with a paddle attachment.  Begin mixing on low speed, then add milk.  Increase speed to medium, and beat in eggs, one at time, beating to incorporate after each addition, then beat in butter.  Add lemon segments, juice, and grated zest.  Beat for about 30 seconds to combine and break up lemons a bit.  Pour evenly into pans.  Bake for 40-45 minutes, until a cake tester comes out with moist crumbs.  Unmold cakes onto a wire rack set over a cookie sheet.

Make the glaze:
In a bowl, combine powdered sugar and lemon juice, stirring until combined.  While the cakes are still warm, brush sides and top with glaze.  Wait 5-10 minutes and brush with glaze again.  Repeat glazing process until glaze is used up.  Let cool completely and enjoy.

The technique for cutting the lemons is called supreming.  I'm sure you can see a video of someone doing it somewhere.  I use it all the time for citrus salads. It's a little daunting at first, but once you get the hang of it, it's a really useful skill.


Sunday, September 1, 2013

Coconut Rice Pudding

I was reading Martha Stewart a while ago, and she had a recipe for coconut rice pudding.  I was intrigued.  I wanted to make it today, but I was concerned about the eggs in her recipe.  I often find pudding made with eggs has an eggy flavor which I don't like.  Plus, she only called for 1/2 c. coconut milk.  That didn't sound like nearly enough coconut flavor.  After looking around, I decided to make my own recipe.  Here it is.  I think it turned out delicious.  5 out of 7 Abbotts concurred.  Well, you can't win them all.

Coconut Rice Pudding

1 1/2 c. cooked rice (from 1 c. uncooked, I think)
1/2 c. coconut
1 can cream of coconut
whole milk to make 4 cups
1/2 tsp salt
1/2 tsp vanilla extract

Measure the cream of coconut, add the whole milk to equal 4 cups liquid.  Combine the rice, coconut, liquids, and salt in a saucepan.  Bring to a simmer over medium heat, turn down to low/med. low to keep a slow simmer.  Cook for 40-45 minutes until it looks like pudding, stirring often. (It will be a little loose when hot, but will thicken up as it cools.)  Stir in the vanilla.  Cool and refrigerate or serve warm.

Look for cream of coconut in the mixed drinks section of the grocery store.

Monday, August 5, 2013

Let's Salsa

It's finally that moment at my house.  The moment when 5 lbs of tomatoes is sitting on my counter, fresh from the garden.  Now I can make salsa and go to my happy place.  MaryRuth told me she didn't have Mom's salsa recipe, so here it is along with a salsa I came up with.

Mom's Salsa

2-3 jalapenos, seeded and diced
5 lb tomatoes, peeled and diced
1 lb tomatillos, chopped finely
3/4 head garlic, minced
1 onion, chopped finely
1/2 bunch cilantro, leaves only, chopped finely
2 limes, juiced
2 TB salt
2 tsp vinegar

If you've gone through all the work to actually follow the directions and chopped everything finely, you just have to mix it together at this point.  Let's say you're lazy and have a food processor; process everything until finely chopped.  You can store this in the fridge for 2 weeks, if it lasts that long.  One note, the tomatoes give off a lot of juice.  You can keep it in your salsa, or you can strain the tomatoes after you chop them.  I like it both ways.

Guacaverde Salsa

1 lb tomatillos
1/2 package prepared guacamole
1 tsp salt
1 TB lime juice
1/2 jalepeno
dash chili powder
dash cumin
1/4 c diced onions
handful of cilantro

Process the tomatillos and jalepeno in the food processor until finely chopped, drain, reserving juice.  Mix tomatillos and jalepeno with the rest of the ingredients.  Add juice until desired consistency is reached--I usually aim for thin guacamole.


Friday, May 10, 2013

Hot Sandwiches

One of our favorite things to eat this time of year is hot sandwiches.  It's warm, so it's comforting, but it's a sandwich, so it's also light and summery.  Also, no matter what my kids like, I can customize the sandwich for them.  Hannah's not fond of provolone, so she has cheddar or Monteray Jack instead, for example.  Here's how I work it: I have the kids tell me how they are making their sandwich that evening.  While they are getting their bread ready, I cut the meat into strips and cook it in a skillet.  I can do two or three sandwiches at a time.  When I flip the meat over, I put on the cheese.  When the cheese is melty, I put the meat and cheese on the sandwich.  Another way would be to make the sandwiches and put them under the broiler to toast.  I've also wrapped them in tin foil and taken them with us for a picnic.  Here are three really good sandwiches.

Philly Cheesesteak

rolls or hoagie rolls
roast beef
provolone cheese (cheddar, if you're from that camp)
onion, sliced thin
red pepper, sliced thin
sandwich spread

For this sandwich, saute the onion and pepper first and set it aside.  Then when you're making the sandwiches, add it to the meat so it warms up.


Reuben Sandwich

rye bread
pastrami
swiss cheese
sauerkraut
sandwich spread or thousand island dressing

For this sandwich, squeeze the sauerkraut dry before you put it on the sandwich, or it will make the sandwich soggy.  I also like to make this sandwich and toast it like a grilled cheese sandwich.


Primanti Bros sandwich
(Who?  The Primanti Bros have a sandwich shop, I think in Philly.  I saw this on Lidia's Italy and had to try it.  The kids were skeptical at first--fries on a sandwich? But, after I tried it and told them how good it was, they tried it and liked it.)

Italian bread (white sandwich bread works too)
capricola (or if you want something cheaper and more familiar, ham)
provolone cheese
cole slaw
french fries
sandwich spread

Yes, you put all this on the sandwich.  It's really a meal in itself.  And also really yummy.

Sandwich Spread

mayo
mustard
pepper, fresh cracked if you can get it

Mix together equal parts mayo and mustard, add the pepper.  You can tweak this to have more mayo or more mustard flavor depending on what you like.  I usually make 1/3 to 1/2 c. for our sandwiches.

Cole Slaw
This is a variation of what Lidia did for the Primanti Bros. sandwich.

1/4 cabbage, shredded
1 carrot, grated
1 tbsp. cider vinegar
1 tbsp. oil
1 tbsp. sugar
salt and pepper to taste--about 1/2 tsp. salt and 1/4 tsp. pepper
1/2 tsp. celery seed

Whisk together the vinegar, oil and sugar.  Add the seasonings and mix together.  Toss with the cabbage and carrot.  One way to keep the cabbage from diluting your dressing is to mix it with 1/2 tsp. salt and let it sit in a colander for 1/2 hour or so.  Rinse it and wring it dry in a towel before you add it to the salad.


Sunday, February 3, 2013

More Ham

I have Mom's ham soup recipe.  It's really good.  It just has an unwieldy name.

Cabbage-Apple-Ham-Dumpling Soup

1 c. chopped onion
1/2 c. sliced celery
2 Tbsp. oil
2 lbs. (8 cups) shredded cabbage
2 lrg. red apples, diced
3 c. julienne ham
4 c. chicken broth (I always want more.)
1 c. water
5 Tbsp. cider vinegar
3 Tbsp. brown sugar
1 1/2 tsp. salt
1/2 tsp. sage

In a large soup pot saute onion and celery in oil until tender.  Add cabbage, cook and stir 5 min.  Add remaining ingredients, except ham.  Cover and simmer, stirring occasionally, 45 min.  Add ham and dumplings (see below).  Cover and cook 15 min.

Dumplings
1 c. flour
2 tsp. baking powder
1/2 tsp. salt
1/2 c. milk
2 Tbsp. oil

Sift flour, baking powder, and salt together into a mixing bowl.  Combine milk and oil.  Add all at once to dry ingredients, stirring just until moistened.

Drop from tablespoon atop soup or stew.  Cover tightly; let mixture return to boiling.  Reduce heat (don't lift cover).  Simmer 12-15 minutes.  Makes 10 dumplings.


Wednesday, January 9, 2013

Ham

" Would you like something to drink? Perhaps some ham?" -FTT Cinderella

We had ham for Christmas dinner and it was delicious. I found this recipe on Food.com for a 

Brown Sugar Glaze. 
1 cup brown sugar
2 Tbsp flour
1/2 tsp dijon mustard
1/8 tsp cinnamon
3 Tbsp apple cider vinegar
3 Tbsp water

Mix everything together. Score the outside of the ham and rub the glaze all over it. If you have a spiral cut ham, you can put it in between the layers a bit. Bake until heated through, according to times and temp on the label. I had a bunch of glaze left over so I was able to pour it over the finished ham and dip it a bit.

After a big ham dinner, inevitably there is a lot of ham left over. One thing my mom would make with ham is:

Ham and Noodle Casserole
Brown cubed ham in butter over medium heat in a large skillet. Add a can of cream of chicken soup, a soup can of milk, 1 tsp. curry powder or to taste and parsley until it looks right. Mix it all together and heat until warm. Add a small carton of cottage cheese being sure to temper it. Warm through and serve over noodles. We would use egg noodles but you could also use shells or some such. 

Saturday, November 10, 2012

This is the first time I've written for this particular blog but I have to agree with Marrisse about Thanksgiving side dishes. I think they make the meal. Here is my contribution.

GARLIC MASHED POTATOES

5 lbs. unpeeled red potatoes, quartered
12 oz. butter, room temperature
5 oz. grated Romano cheese
1-2 Tbsp. chopped garlic
2 1/2 tsp. salt
2 1/2 tsp. oregano

Bring a large pot of salted water to boil. Add potatoes and cook until tender, but still firm and holding onto their skins, about 45 min. Drain.
Stir in butter, Romano, garlic, salt and oregano and mash.

Friday, November 9, 2012

Sweet Potato Thanksgiving Sides

Sweet potatoes are great even when it's not Thanksgiving. But here are a couple of sweet potato options that I think work really well as feast day sides (I'm starting to drool just thinking about them).


Sweet Potato Souffle
(Don't know if it's really a souffle, technically, but it makes for an alliterative title)

2 (29-oz) cans sweet potatoes
3 large eggs
1/2 cup flour
1/3 cup brown sugar
3 Tbsp butter, melted
2/3 cup milk
1 tsp salt
2 tsp cinnamon
1 tsp ginger
1 tsp nutmeg

Topping:
1/2 cup brown sugar
2 Tbsp flour
2 tsp cinnamon
2 Tbsp melted butter
1 cup broken nuts
Directions:
Preheat oven to 350 deg. F.
Blend sweet potatoes, eggs, flour, 1/3 cup brown sugar, 2 Tbsp melted butter, and milk. Mix in spices and beat. Pour into casserole dish.
Mix topping ingredients and sprinkle over sweet potato mixture.

Bake covered at 350 deg. F. for 1 hour, then uncover and bake an additional 15 minutes. Let cool 15 minutes before serving.


If the souffle is a little too desert-y for your meal, or you're afraid it will steal the spotlight from the pumpkin pie, there's always the more savory roasted sweet potatoes.


Roast Sweet Potatoes

Preheat oven to 375 deg. F.

Peel and cut the following in a 1-inch dice
2 1/2 - 3 pounds sweet potatoes
2 onions (or cut in wedges)
2 or 3 medium apples (not red delicious or a tart one like granny smith; something crisp and sweet like fugi or gala)

Spread in single layer in a roasting pan and toss with:
1/4 olive oil
black pepper
salt
a couple sprigs of fresh rosemary and thyme.

Cook at 375 deg for 25 - 30 minutes, or until all is tender.

Monday, November 5, 2012

Thanksgiving Side Dishes

We all know we're going to have turkey and gravy on Thanksgiving, but that's not what I get excited about eating.  I really get excited about the side dishes.  My mom's fabulous stuffing, Emily's super delicious cranberry sauce, Jen's amazing sweet potato souffle.  My mouth is watering just thinking about it.  With Thanksgiving fast approaching, I wanted to send out a challenge to you--post your favorite Thanksgiving side dish recipes or tips before the big day.  May all our Thanksgivings be more thankful and delicious than the last.

My contribution is a recipe I came up with a few years ago.  I wanted green beans in a butter sauce, but couldn't find a recipe, so I experimented and came up with this one.

Garlicky Green Beans in Butter Sauce

2 Tbsp. butter
2 garlic cloves, sliced very thin
2 tsp. flour
1/2 c. chicken broth
2 cans green beans
1/4-1/2 c. sliced almonds
Salt and pepper to taste

Melt the butter in a saucepan over medium heat.  Add the garlic and saute until golden brown.  Stir in flour and cook for a minute to take away the floury taste.  Stir in chicken broth.  Cook until thickened, one to two minutes.  Add green beans and heat through.  Off the heat, add almonds and season to taste.

Here are my tips and suggestions:
--Don't leave the garlic alone, it will go from pale to burnt quite quickly.  Also, don't be tempted to turn up the heat to make it go faster (I always do that.), the burnt will happen quicker.
--If you don't like garlic, either leave it out, or fish it out of the butter before adding the flour.  The second option will give you a subtle toasted garlic flavor.
--The butter sauce is made to be 1 Tbsp butter, 1 tsp flour, and 1/4 c. broth to 1 can green beans, but if you make the recipe as I have it here, you could probably add another can of green beans and have the sauce cover it.
--I usually make the sauce, add it to the green beans and microwave it.
--This can be made ahead of time.  Make the sauce, pour it over the beans and put it in the fridge until you're ready to eat it.  Then, nuke, add the almonds and season.

Thursday, August 23, 2012

Pie + Cake = Pake

There's a silly little show I watch on the Lifetime channel called Drop Dead Diva. The main character's friend tried to make a pie, but the cookbook pages stuck together and she made a cake in a pie shell. Thus was born the pake. A lot of people expressed interest in making their own pakes, so they came up with a recipe (originally posted here):


Classic Pake Recipe

Ingredients:
2 Store bought frozen pie crusts
Store bought cake mix of your choice (we recommend Red Velvet)
Store bought frosting of your choice (we recommend Cream Cheese)
Eggs (as needed on cake box)
Vegetable Oil (as needed on cake box)
1/2 cup White or Dark chocolate chips (if desired)

Directions:
1. Preheat oven to 350°F.
2. Leave the frozen pie crust out to thaw while you are mixing the cake batter. [I made 2 pie crusts from scratch; they worked just fine.]
3. Prepare the cake batter per the instructions on the box.*Note: This will make enough filling for two Pakes. [I made a chocolate cake from scratch, adding 1 box of instant chocolate pudding so it wouldn't be too dry.]
4. Gently poke a few small holes in the bottom of the pie crust, being careful not to poke through the tin.
5. Pour half of the cake batter into each pie crust, approx. 1/2” below the edge. *Note: the cake mix will raise above the edge of the pie crust during baking.
6. Mix in chocolate chips if desired. [I wish I had done this.]
7. Place the Pake on a cookie sheet, and place in the oven on a middle rack.
8. Bake for approx. 35 minutes at 350°F. After 35 minutes, turn oven down to 325°F and continue baking for another 12-15 minutes or until cake is finished. (You can test the cake by sticking a toothpick in the center and pulling it out. It should be relatively clean with very little cake crumbs stuck to it.) [My pake needed another 10 minutes, totaling 25 minutes at 325° F]
9. Let the pake cool completely.
10. If desired, cut the top section of the cake off and place a layer of frosting (or filling of your choice) on the lower half of the cake. Replace the top section. [I did not do this and didn't miss it.]
11. Scoop the remaining frosting onto the cake and frost to the edge of the pie crust. [1 can of frosting is the perfect amount for 2 pakes.]
12. Garnish with dollops of whipped cream around the edges, sprinkles, candy pieces or a cherry (as desired). [Whipped cream would have been good on it. I used sprinkles on one, and pecans, mint chocolate chips, and drizzled caramel on the other.]

Here are my results:
One plain, one frosted
Samuel said, "Delicious!"

Sunday, August 19, 2012

Jalepeno Popper Chicken


I had pinned this recipe on Pinterest and finally got around to making it the other day - it just sounded so good as, hungry, we made our menu for the week.  I always enjoyed jalepeno poppers from Jack-n-the-Box (the only poppers I've had) and this was WORLDS better.  It was full of flavor without being too spicy (because we are spice-heat wimps).  Ben says it was pretty easy to make, too.

Serves 2
Highly adapted from Allrecipes, via Sunny Side Up in San Diego
1/2 cup panko
2 tsp. canola oil
1.5 – 2 tsp. taco seasoning or mixture in notes*
1 egg
2 oz. reduced fat cream cheese
1/4 cup shredded cheddar cheese (we used 2%)
1-2 jalapeño peppers, seeds and ribs removed, minced
2 chicken breasts
Preheat the oven to 375 and place an ovenproof rack onto a rimmed baking dish. Spray with cooking oil.
In a small skillet over medium heat, combine the panko with the canola oil. Cook, stirring often, until the panko is golden and crispy. Place in a shallow bowl or dish. To the panko, add the taco seasoning* and stir to combine.
In another shallow bowl or dish, lightly beat an egg. In a small bowl, combine the cream cheese, cheddar cheese, and jalapeños.
Using a small utility knife, cut a pocket into the side of each chicken breast, or horizontally slice the chicken through the center, until it is almost butterflied. Season the chicken lightly with salt and pepper, and then divide the cream cheese mixture evenly between each chicken breast’s pocket. Use toothpicks to secure, if necessary.
Dip the chicken pieces one at a time first into the egg, and then into the panko mixture, making sure to coat the chicken completely. Place the chicken on the prepared baking rack and cook for about 25-30 minutes, or until chicken is cooked through.

*Note: To make your own taco seasoning mixture, combine 1/2 tsp. chili powder, 1/4 tsp. cumin, 1/8 tsp. garlic powder, 1/8 tsp. onion powder, 1/8 tsp. cayenne pepper, 1/8 tsp. oregano, 1/8 tsp. paprika, and salt and black pepper to taste.

Friday, August 17, 2012

Chicken Zucchini Casserole

I recently made a huge discovery. The past couple of weeks have been really hot - over 100 every day. I like to grill when it's that hot so that I don't heat up the house even more with the oven, but there are days when I just want something baked for dinner. Like pizza. I make pizza at least every other week. So I got out my pizza stone and cooked it on the grill. I had heard of other people doing it, and it worked great. I put it right over the flames (it was taking too long on indirect heat, and I had 3 pizzas to cook), and it didn't burn at all. Then I had a thought - why not "bake" other things on the grill? I bought several stones from Pampered Chef years ago and rarely used them. So far I've successfully cooked zucchini casserole (which my family loves so much they literally lick the pan - see recipe below), eggplant parmesan, and even a beef pot pie with leftover roast beef, veggies and gravy. I wasn't sure if that one would work out, since it had a pie crust on top, but it came out flaky and perfect. Who knew? I just periodically adjust the flames to get the right temperature and rotate it several times; it takes about the same amount of time to cook, maybe even less. Dave said I shouldn't do all my baking on the grill because it costs more for the propane. But on these super hot days, it's an awesome alternative.

Here's the Chicken Zucchini Casserole recipe from Taste of Home. I made a few changes.

  • 1 package (6 ounces) chicken stuffing mix
  • 3/4 cup butter, melted (I use 1/2 cup butter and 1/4 cup milk)
  • 3 cups zucchini, diced 
  • medium carrot, shredded
  • 1-2 stalks celery, diced
  • 1 small onion, chopped 
  • 2 cups cubed cooked chicken breast
  • 1 can (10-3/4 ounces) condensed cream of chicken soup, undiluted
  • 1/2 cup sour cream

Directions

  • In a large bowl, combine stuffing mix and butter and milk. Set aside 1/2 cup for topping. 
  • Saute the zucchini, carrot, onion and celery. Mix with chicken, cream of chicken soup, sour cream and remaining stuffing mixture.
  • Transfer to a greased 2-qt. baking dish. Sprinkle with reserved stuffing mixture. Bake, uncovered, at 350° for 40-45 minutes or until golden brown and bubbly. Yield: 6 servings.

Tuesday, August 14, 2012

Happy 100th B-Day Julia

August 15th is Julia Child's 100th birthday.  I really admire and like her as a person.  Her autobiography, My Life in France, was a fun read.  (But, I wouldn't recommend Julie and Julia, the book.  I liked the movie, but I stopped reading the book in the first chapter.  Julia was right, Julie was rather vulgar.)  I haven't read any of her cook books, but I'm sure they're great, too.  Her views on cooking changed the way that we in America look at food.  She inspired a generation of chefs and home cooks.  She was revolutionary and personable.  In honor of her birthday, I thought I would publish probably the only "French" recipe I know.  It also happens to be one of my cooking triumphs.  I think Julia would have been proud of me.  A few years ago, Aaron and I went to the French buffet at the Parisian in Vegas.  I had the creme brulee, okay, it was so good, I had two.  I had always wanted to recreate it at home, because you can't pick that up at your local Walmart, but I didn't have individual ramekins (who does?).  So, one night I decided to just go for it and make a family sized creme brulee.  Amazingly, it turned out!  It was delicious and creamy.  I enjoyed it for several days, hoarding the leftovers in the fridge, hiding them from the kids.  So, in honor of Julia, I share this recipe with you.  It's from America's Test Kitchen, but I did change the pan size and, of course, the cooking time.

Creme Brulee Family Style

4 c. heavy cream, chilled
2/3 c. granulated sugar
pinch salt
2 tsp. vanilla extract
10 large egg yolks
1/4 c. turbinado sugar (you can also use regular sugar)

1. Adjust an oven rack to the lower-middle position and heat the oven to 300 degrees.  You will need two pans--one slightly smaller than the other.  I used my extra large 9x13 pan and a slightly smaller oval casserole dish.  Cover the bottom of the 9x13 pan with a dish towel.  Place the smaller casserole inside--make sure there is 1/2 to 1 inch space between the two pans all the way around.  Bring a kettle of water to a boil.

2.  Combine 2 c. cream, granulated sugar, and salt in a medium saucepan.  Bring the mixture to a boil over medium heat, stirring occasionally to dissolve the sugar.  Take the pan off the heat, cover and let rest for 15 minutes.

3.  Stir in the remaining 2 c. cream.  Place the yolks in a large bowl and pour in 1 c. of the cream mixture in a slow stream, whisking constantly, until smooth.  Whisk in the remaining cream mixture until thoroughly combined.  Strain through a fine-mesh strainer into a large measuring cup or pitcher.  (Don't skip this step, you want to make sure there are no bits of cooked egg in your creme brulee--just silky goodness.)  Pour the custard into the casserole.

4.  Place the pan in the oven and carefully pour enough boiling water into the pan to reach two-thirds of the way up the sides of the casserole.  Bake until the center of the custard is just barely set and is no longer sloshy.  I think I baked it for 35-40 minutes.

5. Transfer the casserole to a wire rack and let cool to room temperature, about 2 hours.  Cover the casserole with plastic wrap and refrigerate until cold, about 4 hours.

6. Just before serving, uncover the casserole and gently blot the top dry with a paper towel.  Sprinkle the turbinado sugar over the top of the casserole.  Shake it to distribute the sugar evenly.  Ignite a torch and caramelize the sugar.  Refrigerate, uncovered, to rechill the custard, 30-45 minutes.  Serves 8.

If you don't have a torch, you can caramelize the sugar in your oven.  Adjust oven rack to uppermost position.  Preheat oven on hi broil setting.  Place sugar topped custard in oven and broil until sugar is caramelized.  Watch this carefully, it shouldn't take longer than 5 minutes, but burnt sugar is terrible, so again watch carefully.  And you will definitely need to rechill the custard after doing this.

We had this for Family Home Evening.  I had made it the night before and chilled it all day.  We put the sugar on, got my dad's industrial blow torch, and Aaron caramelized the sugar while the kids watched.  It was very dramatic.  Then we dug right in without chilling it again.  Oh man, just thinking about it is making me salivate.

The recipe actually calls for a vanilla bean, but again, who's got that?  If you want those instructions, email me.  You will have 10 egg whites left over from making this, you could make an egg white omelet or an angel food cake.

I hope you will try this recipe in honor of Julia.  She would want you to cook something interesting, to have fun in your kitchen, and to enjoy eating.   Bon appetit!


Saturday, July 21, 2012

Blueberry Zucchini Bread

This is my first ever post in this blog!  This can only mean one glorious thing: I've had time to cook, and the cooking has been good.

A friend of ours gave us a few zucchini from his garden - too many for us to consume in its pure form so I searched for zucchini bread recipes and found one from allrecipes.com that included blueberries - which we also just happened to have!  It was delicious and the blueberries proved to be a wonderful compliment to the zucchini bread.  Now, this recipe is for four mini-loafs, but I made one full loaf and one batch of muffins, so I had to sort of eye the cooking time and stagger them a bit.  Otherwise, I stuck to the original recipe and everyone who tried it (I brought the loaf into the costume shop because that much bread is just too tempting) loved it.  Next time I want to try to cut the oil and sugar by using applesauce, but this occasion was a "use-what-we-got-I-don't-want-to-leave-the-house-in-this-heat" kind of day.

Blueberry Zucchini Bread:

3 eggs, lightly beaten
1 cup vegetable oil
3 teaspoons vanilla extract
2 1/4 cups white sugar
2 cups shredded zucchini
3 cups all-purpose flour
1 teaspoon salt
1 teaspoon baking powder
1/4 teaspoon baking soda
1 tablespoon ground cinnamon
1 pint fresh blueberries
  1. Preheat oven to 350 degrees F (175 degrees C). Lightly grease 4 mini-loaf pans.
  2. In a large bowl, beat together the eggs, oil, vanilla, and sugar. Fold in the zucchini. Beat in the flour, salt, baking powder, baking soda, and cinnamon. Gently fold in the blueberries. Transfer to the prepared mini-loaf pans.
  3. Bake 50 minutes in the preheated oven, or until a knife inserted in the center of a loaf comes out clean. Cool 20 minutes in pans, then turn out onto wire racks to cool completely.

Thursday, June 21, 2012

Grace's Mexican Rice

I have been meaning to publish this recipe for a long time.  For those of you that already have it, I have made some improvements that I hope you will like.

Grace's Mexican Rice

1 lb ground beef
1 lrg onion, diced
2 8 oz cans tomato sauce
1 6 oz can tomato paste
2 tsp each chili powder, cumin, and dried oregano
1 tsp cumin seed
3 tsp salt
1 1/2 c rice
4 c water

Brown the ground beef and onion together.  Add the other ingredients and stir to combine.  Bring to a boil and stir once more to make sure the rice isn't clumping on the bottom of the pot.  (I recommend wearing an apron for this step.  I can't tell you how many times the tomato sauce has jumped out of the pot to get me.)  Cover, reduce heat to low and simmer 30 minutes, stirring half way through.

Serve with:

avocado
lettuce
cheese
onion
olives
tomatoes
salsa
sour cream (or ranch dressing)
Fritos


When I first started making this, Emily suggested to me that I add more water and extra spices--very good advice.  But, I always hated buying the minute rice for this.  First, I don't actually like minute rice, and second, I had a perfectly good sack of rice already in my kitchen.  I started experimenting with regular rice, but, I usually ended up with it being slightly crunchy.  Then I was reading a recipe in America's Test Kitchen where they were cooking rice with other ingredients, and they said to put in more water and cook for a longer time.  So, I tried it with the Mexican Rice and, lo and behold, the rice was perfectly cooked and the meat-rice mix was moist, even a little juicy.  Yummy!

Since first writing this post Dad Abbott has given some more information about the recipe and its origins.  Here it is:


About "Mexican Rice." Judy has often quipped that she married me so my mother would share her secret recipe for Mexican Rice. Here's the background.

After the war and delayed schooling, like so many others couples, my parents struggled financially. Mexican Rice was an unusual dish suitable for entertaining that didn't cost an arm and a leg and was always a big hit. One night guests commented that they had just eaten the same "Mexican Rice" a night or so earlier at a friends, someone my mother had given the recipe.

That was disappointing, so my mother made "Mexican Rice" a family secret. I recall on more than one occasion women saying they had tried to duplicate it, but they could never get it right. This was the early, early 1950's before Mexican cooking was common among Anglos. Our friends didn't recognize the taste of cumin in the meat & rice base.

I hope everyone in our family who likes Mexican Rice has an authentic recipe. It is my all time favorite recipe, but is so labor intensive I usually request it only for birthdays. And now that my mother has passed on, I'm sure she won't mind you sharing it with your friends. You might check with Judy first though if she's your source. Look what she went through to get it.

Sunday, April 29, 2012

More Soups from Soup Week

Emily wanted this recipe from Soup Week.  I love it at this time of year, because I can make it at lunch time and come home after a cold soccer game to a warm meal.  It's a recipe from America's Test Kitchen.  I modified it for the crock pot.  I like it better that way.  The beans are creamier.  Yum!

White Bean and Garlic Soup

1 lb white beans (The recipe calls for cannellini beans, but I've always used great northern beans.)
4 slices bacon, chopped
1 onion, chopped fine
1 small head garlic, top third and loose papery skins removed and discarded
6 cups chicken broth
salt
1 sprig rosemary, or 1 tsp dried
1/4 c. minced fresh parsley, or 1 Tbsp dried

1.  Soak the beans by either bringing the beans and 6 cups water to a boil, simmer for 2 minutes, remove from heat, cover and let soak for 1 hour.  Or you can put the beans in a big pot the night before you want to make this, cover them with water and let them soak until you are ready to make the soup.  Drain the beans and put them in your crock pot.
2.  Cook the bacon in the same pot you used to soak the beans in over medium heat until crisp.  Transfer the bacon to a paper-towel-lined plate, leaving the rendered fat behind in the pot.  Add the onion and cook until softened.  Stir in the garlic head and cook for 30 seconds.
3. Transfer the onion and garlic to the crock pot.  Add the broth and 1 tsp. salt (If you are using the dried herbs, add them now).  Turn on the crock pot to low and cook for 6 hours.
4. Add the fresh herbs, if you are using them now.  Remove the garlic head and squeeze out the softened cloves.  Mince the softened garlic and return it to the soup.  Discard the fresh rosemary.  Season with salt and pepper to taste.  Serve, garnishing with bacon.

Serves 8

Don't be scared by the whole garlic head.  It roasts in the soup and turns nutty and mild.

Sunday, April 1, 2012

Recipes from Soup Week

As promised here are the requested soup recipes from our soup week. (As a side note, when I asked the kids what they wanted for dinner this week, Sophie said, "Egg Drop Soup," and everyone groaned. I guess we're still recovering.)

This first recipe is for Hilary. I got it off the Martha Stewart website.

Seared Beef and Noodle Soup

1/2 lb rice noodles (You can also substitute angel hair pasta.)
1 1/4 lbs beef sirloin (about 1 inch thick)
salt and pepper
2 Tbsp olive oil
10 oz white mushrooms, sliced
2 garlic cloves, minced
6 c. beef stock
3 Tbsp soy sauce
2 tsp. rice wine vinegar
2 carrots, cut into thin strips
1/2 Napa cabbage, shredded (I used regular cabbage.)
2 scallions, including green parts, thinly sliced
1 c. bean sprouts (I left these out and put in peas instead.)

1. Place rice noodles in a large heatproof bowl; pour boiling water over noodles. Let sit until translucent but still slightly chewy, 5-10 minutes. Drain, and set aside.

2. Heat a large saucepan over medium-high heat. Season beef with 1/2 tsp. each salt and pepper and rub with 1 Tbsp oil. Sear beef in pan until golden brown, 3-4 minutes. Sear other side, 3 to 4 minutes more. Remove beef.

3. Reduce heat to medium. Add remaining Tbsp of oil, mushrooms, and garlic; cook, scraping up any browned bits, until mushrooms are tender, 3-5 minutes.

4. Add stock, soy sauce, vinegar, and 2 c. water to the pan (I thought the water made the soup weak, so used more stock instead.); bring to a boil over medium-high heat. Remove from heat; stir in carrots cabbage, scallions, and bean sprouts. (I like my veggies less crunchy, so I simmered them until I thought they were done.)

5. Cut beef diagonally into very thin slices. Ladle the broth and veggies into serving bowls, and place the noodles and sliced beef on top.

Serves 4-6

This next soup is for Tammy. It's a recipe Aaron got in Germany on his mission.

Allgauer Kase Soupe

2 Tbsp butter
2 pieces of bread, cut into cubes
4 Tbsp butter
4 Tbsp flour
4 c. chicken stock, hot
125 g. (or so) soft, spreadable cheese
(We like Boursin, but Alluette is nice too. It should have garlic and herbs in it. This is the flavoring of this soup, so get something nice. You can find this kind of cheese in the specialty cheese section of most grocery stores.)
salt and pepper to taste
dash or two nutmeg
1 Tbsp dried parsley

1. Make the croutons. Melt the butter in a frying pan. Add the cubes, toss and saute until golden brown. Set aside. (When I make this, I cut up a piece of bread for each person who will be eating-8 for our family-then I melt the butter (4-6 Tbsp. for my family) in the microwave and toss with the bread. Then I spread the bread on a cookie sheet and broil it in the oven until it is golden brown. Toss the croutons and brown on the other side.)

2. Make the soup. Melt the butter in the soup pot. Add the flour and stir and cook for a little bit. You want to make sure it doesn't taste like flour. Whisk in the hot broth until there are no lumps. Cook at a simmer for 7 minutes.

3. Cut the cheese into chunks. Stir the cheese into the soup until it melts. Add the salt, pepper, nutmeg, and parsley. Bring to a simmer.

4. Serve with the croutons on top. Or if you're a purist, with them on the side, you don't want your food to touch.

Serves 4 (I double this for my family and there's usually just one serving left over, which Aaron and I fight about for lunch the next day.)

Sunday, March 25, 2012

Soup Week

I always have my kids tell me what they want to eat for the week. It puts some of the meal planning stress off of me. The other week everyone wanted soups. So we decided to have soup week. That's right--a whole week with soup every night for dinner. It was kind of fun and we took pictures of all the delicious soups we ate.

We started out on Friday night with delicious White Bean and Garlic soup. This one was my choice.

It's a great soup because you can make it in the crock pot. The garlic is lovely and mild because it's roasted along with the beans. You also add rosemary. Plus I absolutely adore bean soups and there's bacon. What could be better?

Saturday night was St. Patrick's day so we had Hilary's Irish soup and Brennan's soda bread. I also bought sausage. One time Johnsonville made an Irish sausage. It was lovely, but I haven't been able to find it since. We had bratwurst instead.

The kids loved the bread and the soup. They kept saying how good it was. I used both a leek and cabbage. I really don't like pureed soups, so I only pureed a portion of it.

Sunday night was Cream of Vegetable Soup. I had a mix of broccoli, cauliflower and carrots left over from a fondue dinner we had had earlier in the week and it needed to get used up. I looked up veggie soup recipes and found one that had all three in it. It also had a hint of curry which was a revelation. It made the soup so good. I pureed some of this soup too, but the broccoli didn't puree well and made the soup grainy.


Still, it was a good soup and I served it with cheese.

Monday night I killed three birds with one stone. Hannah wanted grilled cheese--that means tomato soup. Maggie wanted clam chowder and Caleb wanted chicken noodle. I always serve another soup when I make tomato soup because half the kids don't like tomatoes. Good old Campbell's makes the meal do-able.


I had to come up with my own tomato soup recipe when I couldn't find good tomato soup in the canned soup aisle (It was all gone). I also wanted it to be tomato basil soup and somehow could never find the recipe. On a different note, one evening we were eating chicken noodle soup at my mom's house, who really makes the best chicken noodle soup on the face of the planet, and Caleb says, "This is okay, but my mom makes the best chicken noodle soup." I laughed and laughed because the chicken noodle soup I "make" is right out of the can. The clam chowder we had is out of the can too. Aaron was disappointed.

Tuesday night was Aaron's request--Allgauer Kase Soupe.


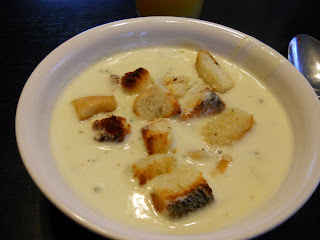
I burned the croutons. It's a family curse. We always burn the garlic bread. Bread in the oven is tricky. But the soup is totally delicious--creamy and herby with a crunch from the croutons--yum!

Wednesday night was Sophie's night. A little while ago I had watched too many Asian cooking shows and wanted to make a noodle bowl. After a little research, I found a promising recipe on Martha Stewart. Sophie LOVED it. She has requested it many times since. If it weren't for the scarcity of steak in our diet, I'm sure we would have had it more often.


It really looks beautiful in the bowl. The steak is rare and then the hot broth cooks it as you eat. I ate it with a spoon, but really you need chopsticks. Sophie ate all the leftovers the next day--slurping and "mmm"ing all the way through.

Thursday was a soup Caleb wanted, I wrote it down, and then he changed his mind to Chicken Noodle, then when we got to this night, he told me that this was the soup he wanted all along. Funny boy. It was Potato Soup.

I love this soup because it has bacon and sour cream in it. It's super yummy.

So, that was our week of soup. The kids were glad when we were done, proving once again that too much of a good thing isn't so good. Also, we had a hard time keeping spoons and bowls clean. It seems like we spent the whole week wondering where the clean spoons were. And finally, as Aaron pointed out, the problem with soup every night for dinner is that then the next day you have soup leftovers for lunch and then soup for dinner again. It was an interesting experience anyway. If you want me to post any of the recipes for the soups we had, let me know.